
When creating a plugin, you may end up defining lots of different settings to configure it. You could then stack them all together in a long long page, put them in separate pages or, better, have them on one page but in different tabs.
This is exactly the issue we were facing while preparing the new version of our chatbot WordPress plugin. It’s much more powerful than the current one which means that it also requires more settings.
To create a tabbed navigation page for the plugin settings, I followed this tutorial. It’s from 2012 but it worked like charm (not many CMS can brag about this level of backward compatibility; of course this also comes with its own share of drawbacks but this is another story). The only BUT is that the tutorial covers many more things beyond tabbed settings and it uses a theme (and not a plugin) as an example so some parts were unnecessarily complicated for the simple WordPress tab navigation example I was looking for.
So I thought that some of you could be interested in a more stripped-down code excerpt showing how to implement tabbed settings in WordPress. Here we go!
Register the Settings
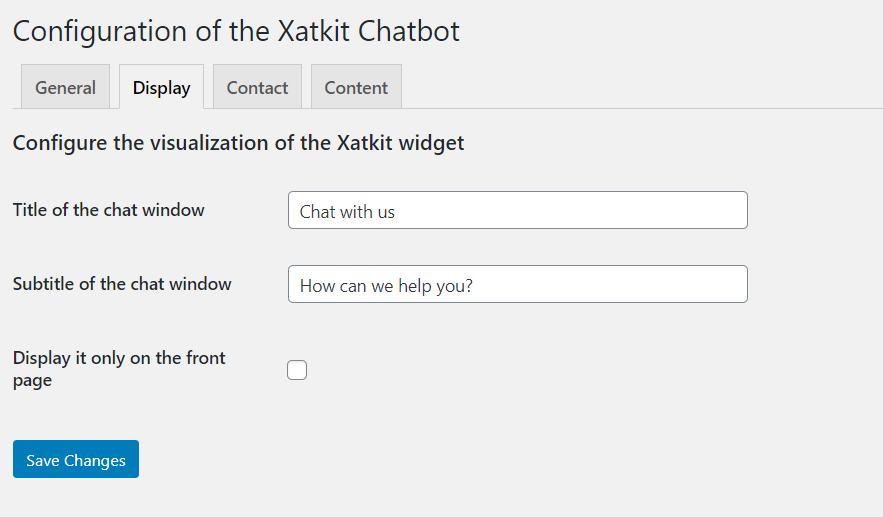
Let’s start by registering the groups of fields that will be retrieved and saved together in each tab. We’ll use them later on when displaying and updating the tab contents. In this example, we’ll just have two different tabs: the general settings and the display settings. This code is executed in the callback function of the admin_init hook.
Defining sections and fields
We now define the sections and settings fields. Each section will go to a different tab. In the definition of each section, we provide for the first time the name of the “page tab” that will display the section. Each field is linked to each corresponding section and also to the page of the setting. This is the simplest scenario to keep everything homogeneous.
In the example, I just add one field per section. xatkit-configuration and xatkit-display are the names of the tabs for each section.
Rendering the HTML of each field
As usual, the callback function of each field needs to generate the HTML tags to render the field. As an example, we show you the one for the Title setting. Note how here we link the field with the registered group we defined at the very beginning.
Creating the Plugin Settings page
Now we have everything ready to create the plugin settings page with a well-structured set of tabs and fields.
In the code below note how:
- We initialize the active tab with the
$_GETvariable (if no tab was marked as active we use the general one as default). - We use the
nav-tab-activeclass to visualize the active tab in WordPress andnav-tab-wrapper to actually render the tabs. - How we then, in the form, we display and post the fields and section that correspond to the active tab.
And that’s it!. Hope you found this useful. Plugin settings is one the complicated parts of WordPress when you’re starting as there is som “magical” parts you need to learn to deal with.
this creates two tabs but then saving doesn’t work